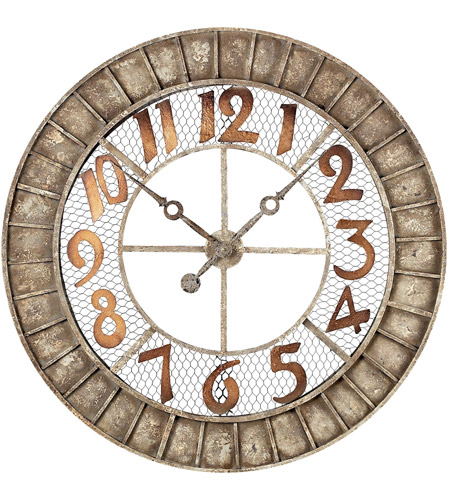
. HARD WOOD FLOORING
Google
 

Engineered Wood Flooring - Saving Time and Trouble


Have you considered using engineered wood flooring? Did you ever put down a hardwood floor? If so, you know you walk out of the room covered in stain, dust and are lucky if your nose hairs are not burned off after breathing in all of the fumes for a couple of days. If you would still like the look of hardwood floors without all of the painstaking work, consider engineered wood flooring.

Unlike laminate flooring, you lose none of the look or quality that you want with hardwood floors when you install engineered wood flooring. This is actually the same exact thing as standard hardwood flooring, but a little easier to install. Instead of having to go through the trouble of sanding and all of the other work that is involved, you only need to install it and then it is good to go.

There are also benefits to using engineered wood flooring instead of laminate flooring. The first and most important is that scratches will not ruin the floor. When you have laminate flooring, it is easy to put down and easy to care for, but if it gets a dig or scratch on it, the piece of flooring is ruined. With engineered wood flooring, you can sand down the spot and refinish it and nobody will be the wiser.

While it is generally advised that you avoid putting down hardwood flooring in wet areas, you can do so with engineered wood flooring as long as it is only going to be light moisture. Areas such as your basement and kitchen are ideal areas for this type of flooring. As long as they are not overly damp or experience leaks or flooding, you should have no problems with your flooring.

Something else to consider is the ease of installation with this type of flooring. You will generally have two options in regards to securing your floor: nailing it down or gluing it down. If you get the thinner planks that are about 3/8" thick, you are best served to secure it by nailing it down. The next size up, the ½" pieces, can actually be glued down. This is a very attractive option as you will not risk damaging the finish that has already been applied to the flooring.

The one argument that laminate floor fans will present is that engineered wood flooring is more expensive that laminate hardwood flooring. While there is no arguing this point, the fact that the laminate cannot be sanded puts the flooring at risk and can actually make the flooring more expensive in the long run. All you are going to need is to ruin a few pieces and the savings will be more than eaten up.

If you want great looking floors, but do not want to go through all of the work that standard hardwood floors are known for, consider installing engineered wood flooring. It will take you less time, give you real hardwood floors and give you the added benefit of a longer life than laminate flooring.

Real Wood or Plastic Laminate Flooring - Which one?


Does the term term plastic laminate floors include engineered wood products? What about real wood planks? If not then what are the differences between these three products?

Although all three are flooring materials, real wood flooring materials are made out only of wood, cut from trees. These are available factory finished or raw.

The second product, engineered wood flooring material, is often mistaken for laminate flooring material. But it is not, and the technical process that both materials undergo explains why.

The first layer and core of engineered wood flooring is commonly made of maple, oak or cherry. But the overall product is fortified with the use of technology coupled with better urethane adhesives. Engineered wood products have become more popular than solid wood planks because while they cost less, they provide the same look, and can easily be refinished unlike solid wood planks. In the matter of installation, engineered wood is like laminate flooring for they can be stapled, free floated or glued down, which is not the case with real wood.

What is plastic laminate flooring material composed of? Most quality laminate planks have three layers, with high density fiber board at the core. The first layer is usually clear and made of melamine plastic material that is fused to the core with the use of heat. If you need to visual this, think of your old formica counter top. However, the big difference is that these materials are around 45% more reslient, compared to the counter tops. Today’s laminate flooring material can easily handle spillage, stains, spills, chips, dents and scratches.

The second layer is called the design layer. It contains the image of ceramic tiles, stone or wood, imprinted on high quality photographic paper. Some manufacturers use a fine surface of wood for this layer.

For the better laminate flooring materials, expect to find a third layer, which gives the plank added sturdiness and strength. The thickness of a laminate flooring material is not an indication of it’s quality. More attention should be paid to the materials used, the processes it underwent and the pressure applied.

As to the material of the third layer, melamine is more stable than paper. It has the ability to bring the boards back to their original position. During production, all three layers are fused together with the use of intense heat, making them stronger and dense.

What other qualities should you consider aside from the superior technical benefits a laminate product has compared to real and engineered wood products?

Laminate floors can easily absorb noise, this is because padding material is generally placed under the laminate material. Wooden floors don’t have this option.

In the aspect of maintenance, when real wood and engineered wood products lose their luster, they can be polished back to their natural state. Where laminate flooring is concerned, you can purchase touch up and chip repair kits. You can also replace the damaged plank. How’s that for low maintenance?

Changes of weather, and heavy traffic, do not change the quality of the design of laminate flooring. This makes it ideal flooring for heavy traffic areas like the kitchen, dining and living rooms.

On the other hand, great care has to be exercised in deciding where to place wooden floors. The sun, rain, spillage and excessive traffic affect the looks of real and engineered wood products, causing discoloration over time. And while it is true wooden floors can be easily waxed and polished, you don’t have to do a thing about laminate floors.

A special mention needs to be said about excessive moisture. All three products react badly to moisture. In the case of wooden floors, the planks will warp and when the moisture has soaked in, lose their shape and polish. However, laminate floors can take moisture better than the other two, and is not too expensive to repair.

Inevitably, the choice of purchasing engineered wood flooring or laminate flooring products – lies with you.

Engineered wood has its’ own special merits. But laminate flooring materials have come a long way from being inferior substitutes. Today’s laminate flooring materials have benefitted immensely from superior technology and state-of-the–art processes. The consumer has a wider range of realistic designs, from stone, wood and ceramic to choose from. Laminate floors are durable, easier to maintain, install and repair, compared to the other two products.

4 Decorating Solutions For Your Bathroom's Brown and Turquoise Tile Floor

While colors can date a room, they can also make it look very contemporary. One color combination that has gained tremendously popularity is brown and turquoise. While the color palette may sound modern and bold, it can also be muted and organic depending on how you accent the space. So, consider a bathroom with brown and turquoise floor tile and all of the possibilities that it offers.

There is Brown and then There is Brown
A wonderfully neutral and organic color, brown can be a perfect wall color to showcase this beautiful color combination in the tile. For a larger bathroom you can go with a rich, chocolate brown and accessorize in a lighter brown. Chrome fixtures will repeat the silver in the mirror, or porcelain fixtures could be used to echo the color of the tub. If your bathroom is smaller you may opt for a lighter tone in your brown wall color with a single accent wall in chocolate brown. To pull the turquoise into the room you have the option of picking up the color in your towels and shower curtain, or you can add a fun cabinet or stool to the room and paint it turquoise.

Contrast and Repetition
If you do not necessarily want to showcase the floor, then you can pull these two contrasting colors throughout the room. For example, you may choose to paint a focal wall brown on the upper half and a shiny turquoise on the bottom. Then paint the remaining walls a pale blue with brown stenciling for border designs. You can pull both colors in through towels, shower curtains and accessories. Since these colors are also organic think about using brown branches in a large turquoise vase, brown pebbles in a turquoise bowl or brown and turquoise beads in a glass bowl.

Retro is In
Turquoise is a perfect example of how everything old is new again. While turquoise can offer a very modern aesthetic, it can also illicit a retro vibe when combined with colors like burnt orange, mustard yellow and avocado green. You can tie all of the colors together by selecting a shower curtain or area rug that contains them all. If you have enough counter space you can embellish with retro accessories like a lava lamp. Fun, geometric shapes throughout your accessories including lighting fixtures and wall art will finish off the look.

Accentuate the Warmth
If you are worried about your bathroom not having a warm feel to it, instead of accentuating the cool turquoise tones, you can play off of the earthier brown colors. By pairing a warm red or orange with the brown, you can actually make the turquoise recede into the background. By having natural wood in your window and door frames, you add an organic and warm feel to the room. With soft warm lighting and luxurious warm tones in your towels and rug the room will feel inviting and cozy. Then you can balance the turquoise in the floor tile by adding a small turquoise vase or candle, and your bathroom will be warm, cozy and balanced.

How to Tile a Floor - Bathroom Or Kitchen

How to tile a floor - tiling a bathroom/kitchen floor is a straight forward process if you know the right techniques to go about the job.

The most important part is the preparation, the removal of the toilet and basin is highly recommended to eliminate the need for awkward cuts around the toilet pan and the basins pedestal. Removing the toilet and basin will also result in a lot neater finish to the job.

Prepare the floor using ply wood sheet or a self levelling compound and coat with a layer of pva adhesive, this will help aid the adhesion of the tiles.

The next step is to work out the tile spacing, this is important to ensure that the tiles at the edge of the room are not slithers, and also to produce a symmetrical finish to the floor.

Now its time to start tiling, mix up some tile adhesive and spread it on the floor using a notched adhesive spreader, now lay the tiles on the floor and separate with a 5mm tile spacer. Once the whole floor area is covered leave the floor to fully set.

When the floor is fully set its time to apply the grout, mix up the grout and apply with a grout float or a grout spreader, when the grout has partially set, sponge of the excess with a damp sponge.

There are different types of adhesive available for different types of floors and tiles, care should be taken in the type of adhesive purchased.